

Free plans to build a DIY Kitchen Herb Garden Planter from a cedar fence picket! Plans from ana-white.com

Since next week is Teacher Appreciation week, Grace and I have been conspiring to make an inexpensive but thoughtful gift for her teacher. Our little kintergartener sure loves her teacher, and we wanted to do something to show Mrs. R just how much we appreciate the extra heart she puts into the children.
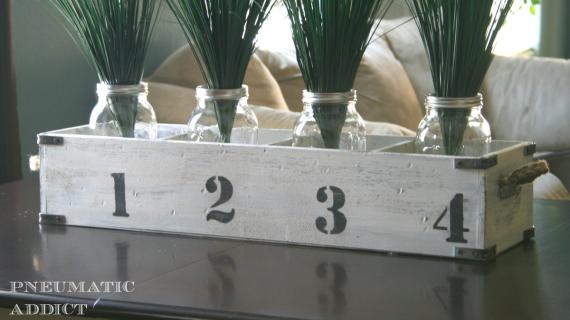
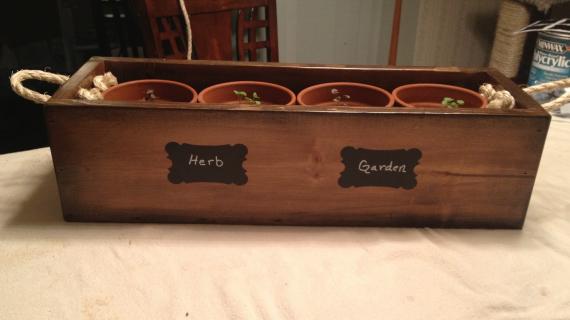
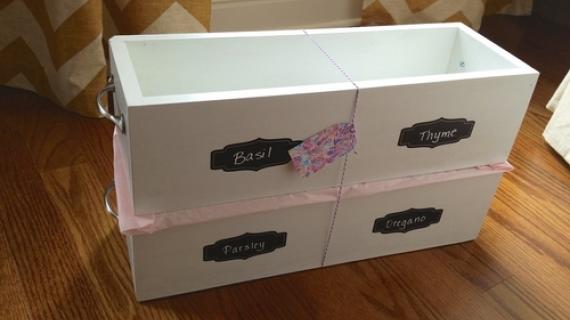
My friend Kari from Ucreate made this adorable garden gift basket as a Teacher Appreciation gift

via Ucreate
And Grace and I felt like this saying sums up everything Mrs. R is all about.

via Ucreate
But of course, we have to make a wood planter, don't we?
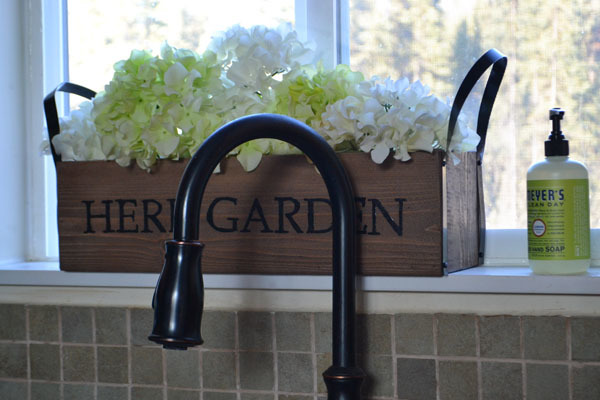
I've been pinning quite a few planter ideas, and I especially love the idea of a kitchen window herb garden.

But how to make, keeping the cost down?

You already know I have a thing for cedar fence pickets. Where else can you get a good cedar board for less than $2? It's amazing what you can make from one! I decided to make this project from exactly ONE cedar fence picket.
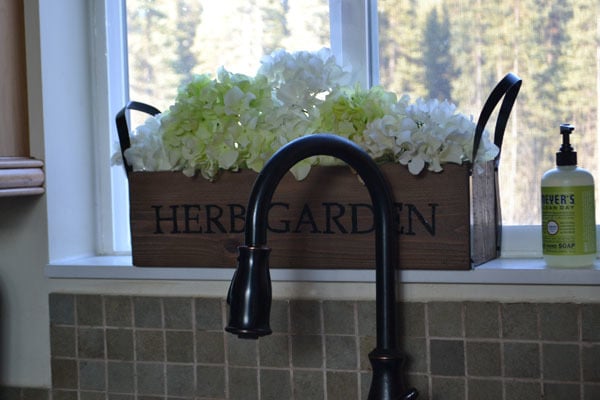
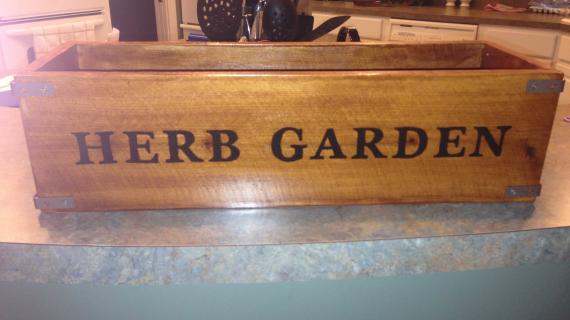
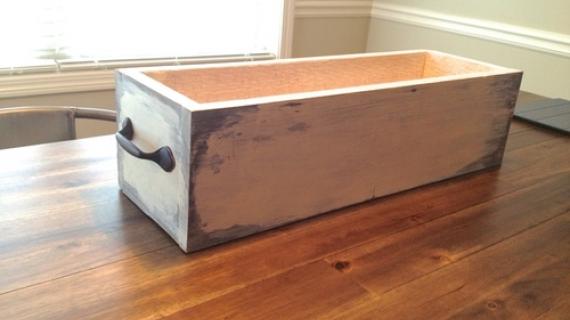
And this is what it looks like chopped up and nailed back together - literally 5 minutes of building time.

Please don't tell Mrs. R that we spent $2 and 5 minutes on her Teacher Appreciation gift. It's our secret, okay?
And don't tell her I dug in the trash for those handles.

I'd be mortified if she found out I went through the trash at the Momplex to come up with this metal strapping piece used to band wood together.
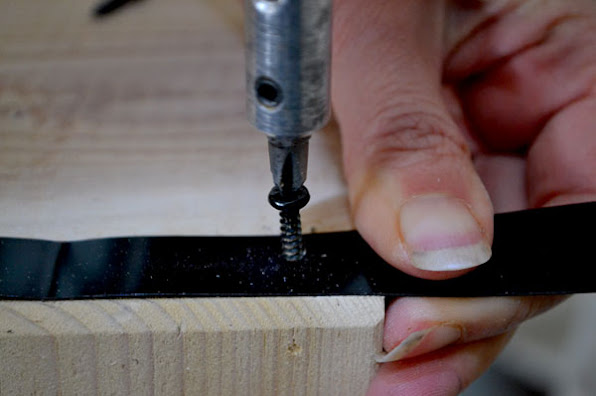
I promise, I wiped it down before I screwed it to the sides of the planter.

And it is really sturdy and functional.

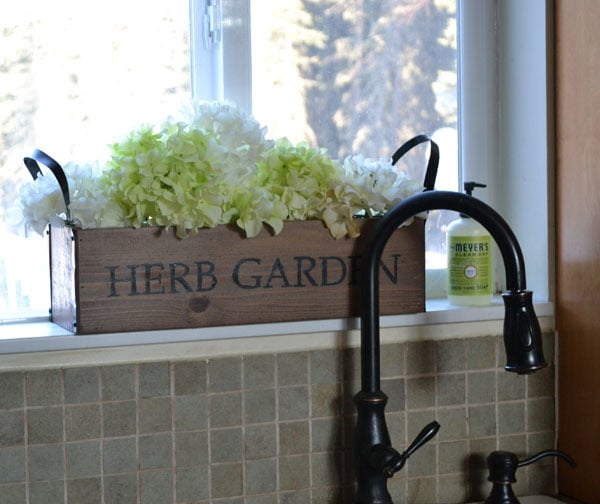
While adding a pretty rustic touch to the ends.
But if we do get found out, here's our saving grace (well, our other saving Grace)

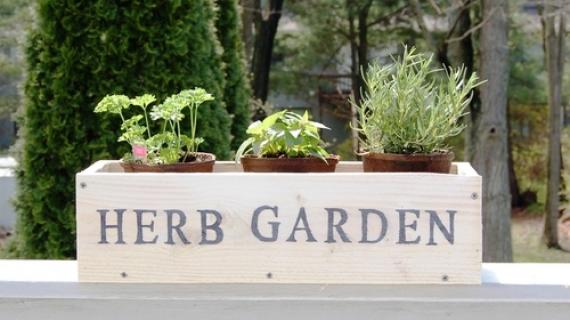
I did hand trace letters out on the front

And hand paint the letters with black craft paint.

On second thought, maybe we better give Mrs. R something a little more expensive and difficult to make.

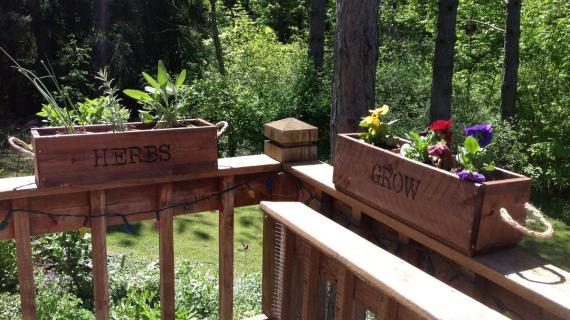
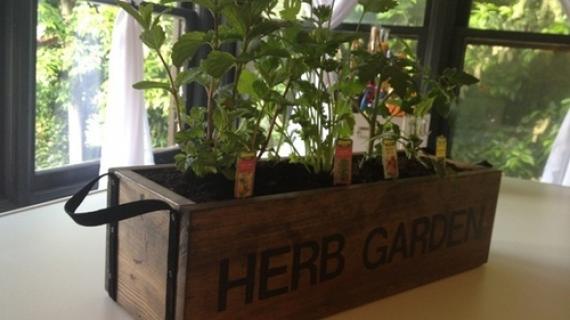
Because the herb garden kitchen planter sure looks good on my windowsill, and I'd love to break off a sprig of parsley or a handful of basil fresh from the plant, savoring the aroma of fresh herbs in our food.
Or I could go make another one.
Yes, I could do that.

Grace and I also love these DIY seed packets - perfect if you are gifting multiple Kitchen Herb Garden Kits and want to split seeds up into cute packages. It's be fun to make a DIRT one too!
And if you'd also like to be a lazy cheapskate like us, you can follow the simple instructions below to build your own Kitchen Herb Garden Planter from just one cedar fence picket!
Have a great weekend!
XO Grace and Ana
Preparation
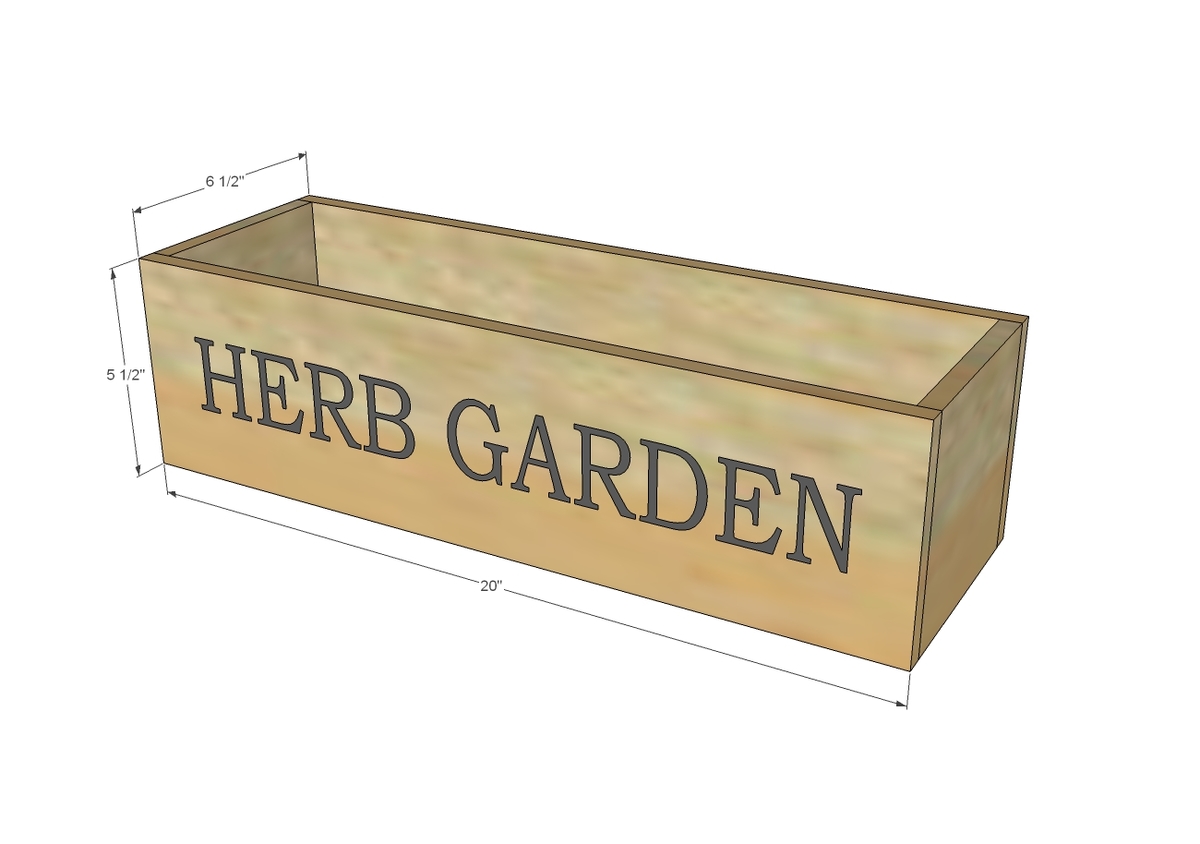
1 cedar fence picket, 5--1/2" wide
1 1/4" exterior galvanized finish nails (you could use exterior screws too)
Wood glue suitable for exterior applications
2 - 5 1/2" wide by 1/2" thick cedar fence pickets @ 5 1/2" long
2 - 5 1/2" wide by 1/2" thick cedar fence pickets @ 20 " long
1 - 5 1/2" wide by 1/2" thick cedar fence pickets @ 19" long


Please read through the entire plan and all comments before beginning this project. It is also advisable to review the Getting Started Section. Take all necessary precautions to build safely and smartly. Work on a clean level surface, free of imperfections or debris. Always use straight boards. Check for square after each step. Always predrill holes before attaching with screws. Use glue with finish nails for a stronger hold. Wipe excess glue off bare wood for stained projects, as dried glue will not take stain. Be safe, have fun, and ask for help if you need it. Good luck!
Instructions
Step 1
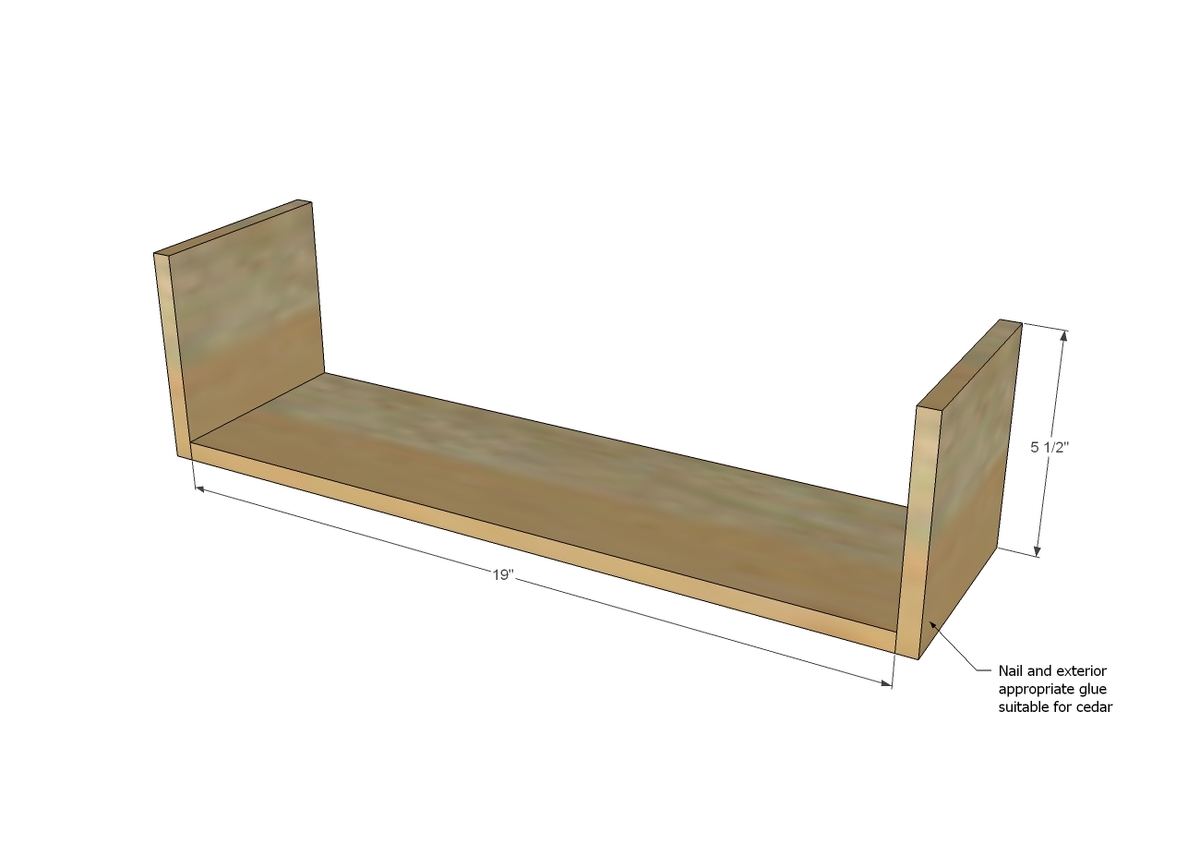
Nail the two ends to the bottom
Step 2
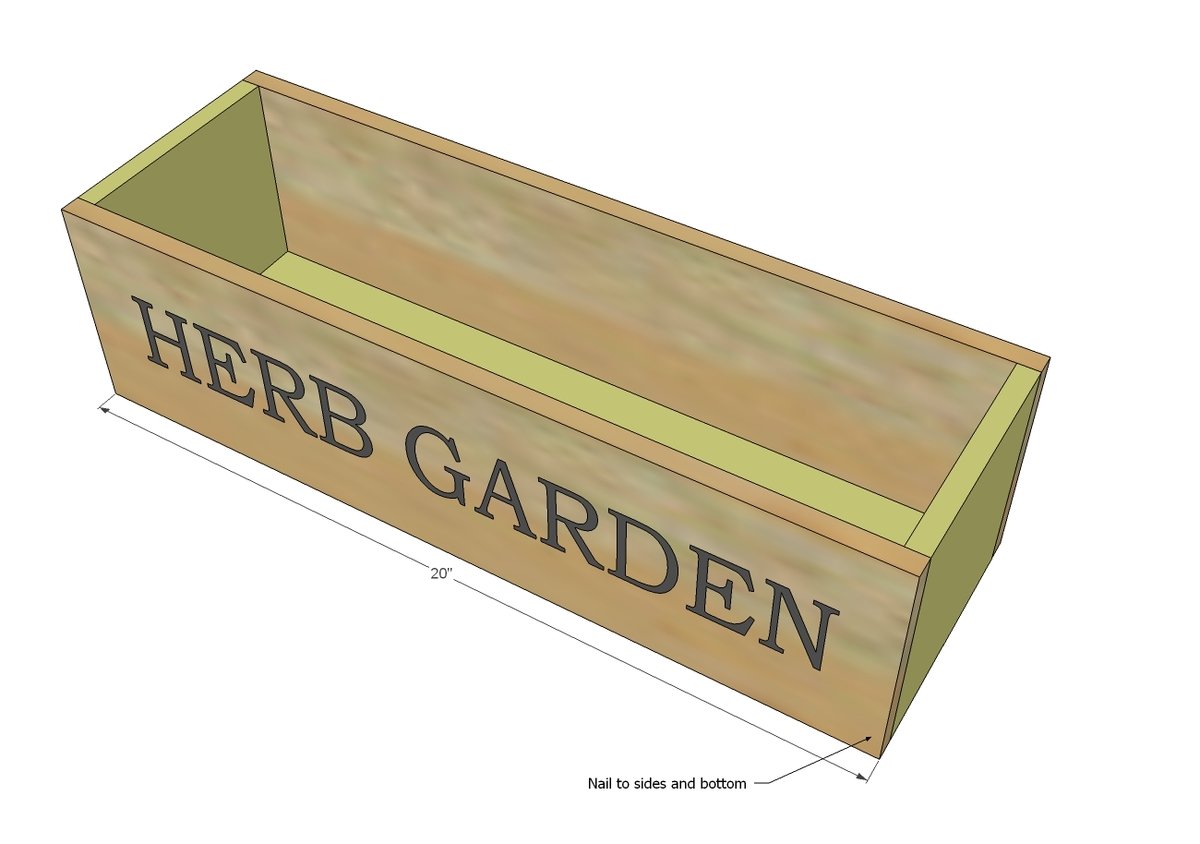
Then nail the two sides to the bottom and ends. Easy peasy!
It is always recommended to apply a test coat on a hidden area or scrap piece to ensure color evenness and adhesion. Use primer or wood conditioner as needed.


.jpg)
Comments
sraper2
Fri, 04/26/2013 - 10:06
I know what I will be making
I know what I will be making soon...love this!
Ana White
Fri, 04/26/2013 - 10:10
Thank you - its super fun and
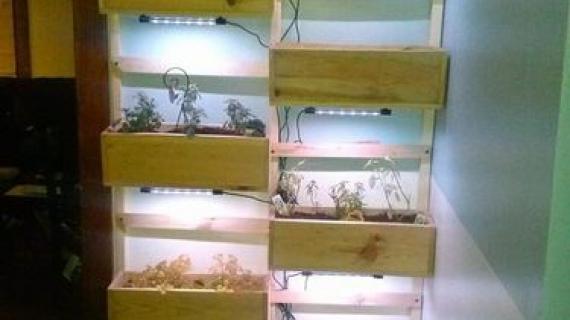
Thank you - its super fun and easy! I even thought about making a bunch of them and putting ladder sides on and leaning against a wall outside for a cheap and chic taller planter!
Hope to see yours soon!
Ana
Julielszabo
Fri, 04/26/2013 - 12:24
Herb garden
Hi, Ana!
Thank you so much for your plans!
Because of you, my husband has built the farmhouse queen bed, two side tables, and the Land of Nod bunk. We never would have been able to afford these pieces retail. Now he just needs to get motivated to build both of us some dressers to match the farmhouse bed!
You mentioned putting ladder sides on your planters and leaning them against an outside wall. How would you do this? We have a huge blank brick wall behind our garage.
Also, what stain did you use on your "Herb Garden" planter and how did you protect it?
Thank you for all of your time and effort. I love seeing your projects.
Julie
Ana White
Fri, 04/26/2013 - 13:08
Hi Julie, thank you - what a
Hi Julie, thank you - what a very nice comment! Totally made my day! And I love your profile picture!
I am working on a tutorial of a leaning ladder planter - check out this plan for the gist of how it's done http://ana-white.com/2013/04/plans/little-sloan-leaning-bookshelf
I used Minwax Special Walnut for the stain color and Minwax Helmsman Spar Urethane (it's exterior grade) for the top coat. I sanded pretty good the raw board first to make things easy. I have a full tutorial to be posted next week on the finish.
Thank you so much - enjoy your weekend!
Ana
dmcarwin
Fri, 04/26/2013 - 15:34
Lazy Cheapskate?
I am not sure that is best way to describe it, I would go more along the lines of.....dang I am not witty enough to come up with something good....let's just say, Amazingly Awesome!!!! I personally love the lazy cheapskate (aka, amazingly awesome) route myself, with six kids it is a must! This is so stinkin' cute it will seriously be the best gift Grace's teacher gets! You "nailed" it! (ha, pun intended) Thanks for sharing and I especially love the cute handles, I like pulling things out of the trash too!! Love your work Ana!
BrettPaPa
Mon, 05/13/2013 - 08:43
Herb Garden!
I helped my grandson make this for his Mom for Mothers Day. All I can say is there were tears shed!
Thanks so much Ana!!!
seesaw
Wed, 03/12/2014 - 09:14
Craft Club Project!
I'm getting with a group of ladies to build these tomorrow. One of our concerns is making it "waterproof" for windowsills or other indoor surfaces. Any suggestions?